Archives January 9, 2025

Residential Painting: Transforming Your Home Inside and Out

Residential painting is a transformative process that breathes new life into your home. Whether you are refreshing the interior walls for a cozy ambiance or giving your exterior a vibrant facelift to boost curb appeal, painting is one of the most effective and affordable ways to revitalize your living space. This guide delves into the benefits, differences, and key considerations of both interior painting and exterior painting, helping you make informed decisions for your home improvement project.

Interior Painting: Adding Style and Comfort

Interior painting focuses on the walls, ceilings, and trim inside your home, offering endless opportunities to personalize your space. The right choice of colors can dramatically change the atmosphere of a room—soft pastels create a calming effect, bold hues bring energy, and neutral tones offer timeless elegance.

One of the main advantages of interior painting is its ability to enhance the overall mood of your home. A fresh coat of paint can make a small room feel larger, add warmth to a stark space, or even improve lighting by reflecting more light. Additionally, modern paint options come with various finishes, such as matte, satin, or gloss, to suit your aesthetic preferences and functional needs.

When planning an interior painting project, it’s essential to prepare the surfaces properly. This includes cleaning walls, repairing cracks or holes, and applying primer for a smooth, long-lasting finish. Professional painters also help homeowners choose the right type of paint, such as low-VOC or washable varieties, to ensure a safe and durable result.

Exterior Painting: Protecting and Beautifying

Exterior painting focuses on the outside surfaces of your home, such as siding, trim, doors, and even fences. Beyond aesthetics, it serves as a protective barrier against weather elements like rain, UV rays, and temperature fluctuations. A high-quality exterior paint job not only improves the visual appeal of your home but also extends the lifespan of its structure.

The choice of exterior paint color plays a significant role in creating a welcoming first impression. Whether you prefer classic shades that blend with the neighborhood or bold tones that make a statement, the options are endless. Additionally, exterior painting requires durable, weather-resistant paints designed to withstand environmental challenges without fading, peeling, or cracking.

Preparation is equally important for exterior painting. This involves cleaning surfaces, removing old paint, and repairing any damaged areas to ensure the new paint adheres properly. Professional painters often recommend painting during mild weather conditions to achieve the best results and avoid issues caused by humidity or extreme temperatures.

Benefits of Residential Painting

Both interior and exterior painting offer numerous benefits:

  • Enhanced Aesthetic Appeal: A fresh paint job refreshes the look of your home, making it more inviting and visually pleasing.
  • Increased Property Value: A well-painted home can boost its resale value and attract potential buyers.
  • Improved Protection: Exterior paint shields your home from the elements, while interior paint protects walls from wear and tear.
  • Personalization: Painting allows you to customize your home to reflect your personality and style.

Choosing the Right Professionals

While DIY painting can be rewarding, hiring professional painters ensures precision, efficiency, and high-quality results. Experienced painters have the tools, skills, and knowledge to handle both interior and exterior projects, delivering a flawless finish that stands the test of time.

Final Thoughts

Residential painting is more than just a cosmetic upgrade—it’s an investment in your home’s appearance, durability, and value. Whether you’re updating your interiors to create a cozy retreat or giving your exterior a bold new look, painting is the perfect way to refresh your living space. With proper planning and the help of skilled professionals, you can transform your home into a beautiful, welcoming haven.
What’s the Best Way to Filter Iron? A Simple Guide to Your Options

Let’s face it – dealing with iron in your water can be tricky. With so many filtering options out there, how do you know which one is best? We’ve helped thousands of homeowners tackle their iron problems, and we’re here to break down all your options in simple terms.

Understanding Your Iron Problem

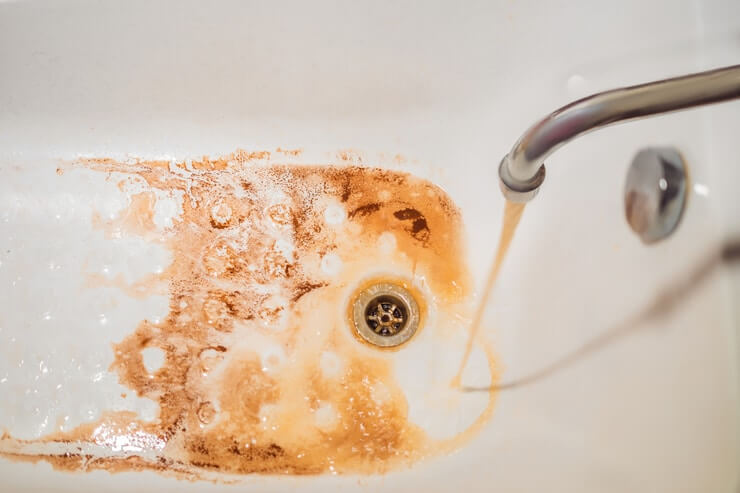
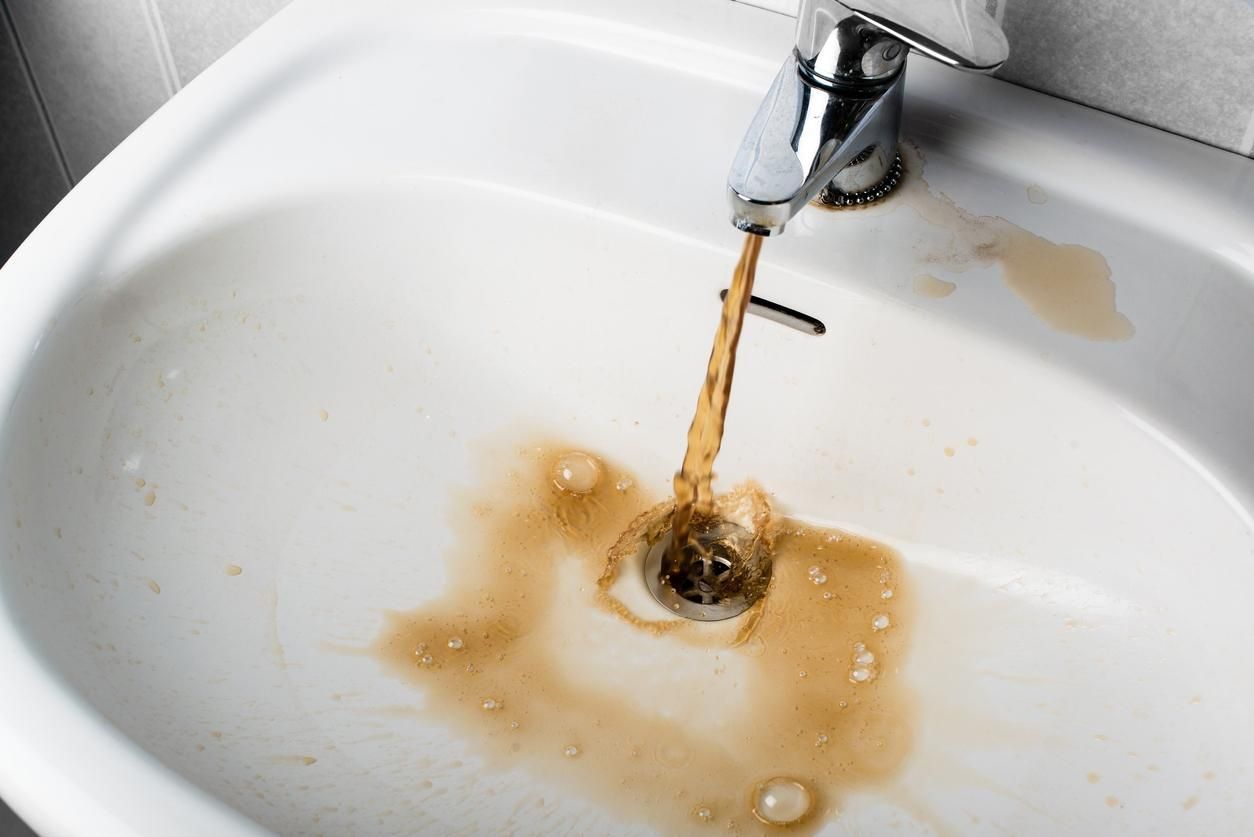
Before we dive into solutions, let’s quickly figure out what type of iron you’re dealing with. Think of iron in water like chocolate in milk – it can either be completely dissolved (clear water that turns orange later) or already visible (water that looks orange right away).

Types of Iron You Might Have:
– Dissolved iron (clear at first, then turns orange)
– Particulate iron (visible orange particles)
– Bacterial iron (slimy orange growth)

Top Iron Filtering Methods Ranked

Let’s look at the most effective ways to filter iron, starting with our top recommendations:

1. Air Injection Iron Filters (see more: Well water treatment from SoftPro)
Think of these like a tiny waterfall in your plumbing. They add air to your water, which makes the iron easier to catch. They’re great because:
– They don’t need chemicals
– They’re easy to maintain
– They work well for most homes
– They last a long time

2. Chemical Oxidation Systems
These systems are like adding rust accelerator to your water. They turn invisible iron into visible particles that can be filtered out. Benefits include:
– Handles very high iron levels
– Works on multiple water problems
– Great for really tough iron issues
– Perfect for well water

3. Water Softeners with Iron Filters (see more:

more information

This combo is like having a dynamic duo fighting your water problems. The softener handles minor iron while the filter tackles the tough stuff. Good points:
– Removes iron and hardness
– Protects your plumbing
– Improves soap effectiveness
– Prevents scale buildup

Which Method Is Right for You?

Let’s match your situation with the best solution:

For Light Iron Problems (1-3 ppm):
– Water softener might be enough
– Basic iron filter
– Simple sediment filter for visible particles

For Medium Iron Problems (3-7 ppm):
– Air injection system
– Combined softener/iron filter
– Regular maintenance schedule

For Heavy Iron Problems (7+ ppm):
– Chemical oxidation system
– Professional-grade iron filter
– Possibly multiple treatment steps

Cost vs. Effectiveness Breakdown

We know budget matters, so here’s what you can expect to spend and save:

Budget-Friendly Options ($500-$1,500):
– Basic water softeners
– Simple iron filters
– DIY installation possible

Mid-Range Solutions ($1,500-$3,000): 
– Air injection systems (resources:

softprowatersystems.com

– Quality combination systems
– Professional installation recommended

Premium Systems ($3,000+):
– Chemical oxidation systems
– Whole-house treatment
– Professional installation included

Installation Tips

Whether you’re handy or prefer professional help, here’s what to know about setting up your iron filter:

DIY Installation:
– Read all instructions carefully
– Have basic plumbing tools ready
– Allow plenty of time
– Know when to call for help

Professional Installation:
– Gets done right the first time
– Usually includes warranty
– Often includes water testing
– Proper system sizing

Maintaining Your Iron Filter

Keep your system running smoothly with these simple tips:

Monthly Tasks:
– Check for proper operation
– Listen for unusual noises
– Watch your water quality
– Clean external parts

Yearly Tasks:
– Deep clean the system
– Replace any filters
– Check all settings
– Schedule professional service

Making Your Final Choice

Still not sure which way to go? Ask yourself these questions:
– How bad is your iron problem?
– What’s your budget?
– Do you have other water issues?
– How much maintenance can you handle?

When to Get Expert Help

Sometimes it’s best to call in the pros. Consider professional help when:
– Your water test shows multiple problems
– You’re not sure about installation
– Previous solutions haven’t worked
– You want a long-term guarantee

Final Tips for Success

Whatever system you choose, remember these key points:
– Test your water first
– Consider your long-term needs
– Factor in maintenance costs
– Don’t skip regular upkeep

Need more help choosing the right iron filter? We’re here to help you get the clean, clear water you deserve!

Steg-för-Steg: Så Färgar Du Håret Hemma som ett Proffs

Att byta hårfärg på egen hand kan vara både ekonomiskt smart och roligt, men det kräver noggrannhet för att resultatet ska bli jämnt. Genom att ha tålamod och precision kan du få ett vackert färgat hår utan att behöva besöka salongen. I den här guiden tar vi dig steg för steg genom hur du uppnår drömhåret med din hemmablekning.

Steg Ett: Förberedelser Innan Hårfärgning

Innan du ens börjar är förberedelserna avgörande. Att förstå processen är nyckeln till ett jämt resultat. Börja med att välja en ton som harmonierar med din stil. En

brun hårfärg

kan vara ett klassiskt val för många och passar ofta bra till en neutral hudton.

När du har gjort ditt val är det dags att förbereda arbetsytan. Du behöver pensel, en gammal handduk för att skydda dina kläder och eventuellt ett balsam för att återfukta håret efter färgningen. Glöm inte att göra ett hudtest genom att applicera en liten mängd färg på huden och vänta i 24 timmar för att undvika oönskade reaktioner.

Applicera Hårfärg som ett Proffs

När allt är redo är det dags att påbörja färgningen. Börja med att fördela håret i mindre sektioner med hjälp av hårklämmor. Detta gör det enklare att arbeta systematiskt och säkerställer ett jämt resultat. Färgen ska läggas vid hårbotten, där håret får mest färg och sedan arbeta sig neråt.

Se till att täck varje hårslinga och följ instruktionerna noggrant för den specifika nyansen. När all färg är applicerad är det dags att ge färgen tid att sätta sig. Använd en timer för att undvika överfärgning.

Avslutande Steg för Perfekt Resultat

När verkningstiden är klar är det dags att tvätta bort färgresterna. Använd ljummet vatten och skölj håret noggrant tills vattnet är helt fritt från färgrester. Applicera sedan ett hårinpackning för att ge håret ny glans. Undvik att tvätta håret med schampo under de första 48 timmarna efter färgningen för att bevara färgintensiteten.

För att bibehålla din nya hårfärg, använd produkter utvecklade för färgat hår. Undvik stark sol eftersom dessa faktorer kan påskynda färgförlust.

Tips för att Lyckas Varje Gång

En lyckad färgning av håret hemma kräver tålamod och noggrannhet. Vanliga misstag inkluderar att överskrida verkningstiden. Glöm inte heller att ta hand om håret efteråt. För bästa resultat, följ instruktionerna och var inte rädd för att förbättra tekniken om något känns osäkert.

Avslutande Tankar

Att uppnå salongsresultat hemma behöver inte vara komplicerat om du följer rätt steg och är noggrann. Genom att följa instruktionerna kan du känna dig nöjd med ditt hår. Oavsett om du väljer en ljus blond nyans, är hemligheten i förberedelsen och efterbehandlingen. Så öppna färgtuben och låt din nya hårfärg glänsa!

How to Get Rid of Iron in Water: A Complete Guide

Are you tired of those ugly orange stains in your sinks and toilets? 

We understand how frustrating iron in your water can be. Let’s walk through everything you need to know about getting rid of iron in your water, explained in simple terms that anyone can understand.

What Causes Iron in Water?

Before we jump into solutions, let’s understand where this problem comes from. Iron naturally exists in the earth’s soil and rocks. When water moves through these materials, especially in well water, it picks up iron along the way. Think of it like tea steeping in water – the longer water sits in iron-rich soil, the more iron it collects.

How Do You Know If You Have Iron in Your Water?

Here are some common signs that you’re dealing with iron in your water:
– Orange or brown stains in sinks, tubs, and toilets
– Metallic-tasting water
– Clothes coming out of the wash with rusty stains
– Water that looks clear when first drawn but turns orange after sitting

Simple Solutions for Iron Removal

Let’s look at different ways to tackle iron in your water, starting with the easiest methods:

1. Water Softeners
If you have low to moderate iron levels (under 3 parts per million), a water softener might do the trick. Water softeners are like magnets that attract iron and other minerals, pulling them out of your water. However, they’re not the best choice if iron is your only problem.

2. Iron Filters
These are the champions of iron removal. Iron filters are specially designed to tackle iron problems, and they work like a strainer that catches iron particles while letting clean water through. Resource:

more information

They’re perfect for:
– Well water with high iron
– Homes with orange staining problems
– Situations where water softeners aren’t enough

3. Oxidation Systems
Think of oxidation like turning iron rust. These systems use air or chemicals to convert dissolved iron (the kind you can’t see) into particles that can be filtered out. It’s like making the invisible enemy visible so we can catch it!

Steps to Get Started

1. Test Your Water
First things first – we need to know what we’re dealing with. 

Get your water tested to find out:
– How much iron you have
– What type of iron it is
– If there are other problems to address

2. Choose Your Treatment Method

Based on your test results, pick the right solution:
– Less than 3 ppm iron: Consider a water softener
– More than 3 ppm iron: Look into an iron filter
– Multiple water issues: Maybe combine treatments

3. Install Your System

While some handy homeowners can install simple systems, we usually recommend professional installation for:
– Proper system sizing
– Correct installation
– Optimal performance setup

Maintenance Tips

Once you’ve got your iron removal system in place, here’s how to keep it running smoothly:

1. Regular Checks
– Look at your water quality monthly
– Watch for any changes in taste or color
– Check for new staining

2. System Maintenance
– Clean or replace filters as recommended
– Add salt to water softeners when needed
– Schedule yearly professional check-ups

Cost Expectations

Let’s talk about what you might spend to fix your iron problems:

– Water Softeners: $800-$2,500 installed
– Iron Filters: $1,500-$3,000 installed

this page

– Oxidation Systems: $2,000-$4,000 installed

Remember, these are investments in your home that will:
– Protect your plumbing
– Save money on cleaning products
– Prevent damage to appliances
– Improve your water quality

When to Call a Pro

While we love DIY solutions, sometimes you need expert help. Call a water treatment professional when:
– You’re not sure what’s causing your iron problems
– Your DIY solutions aren’t working
– You need help choosing the right system
– It’s time for installation or maintenance

Final Thoughts

Getting rid of iron in your water doesn’t have to be complicated. Start with testing, choose the right solution for your situation, and maintain your system properly. Remember, every home is different, so what works for your neighbor might not be the best choice for you. 

Need more help figuring out your iron problem? 

Here’s a great solution: Well water treatment from SoftPro or reach out to a local water treatment expert who can test your water and recommend the perfect solution for your home.  Either way, you’ll want to correct this issue with your home’s water before consuming or bathing in water with iron.  Here’s to your health and well-being!